
Ever wondered where FlightAware or FlightRadar get all the info they show on their sites? Folks like me (and maybe you too!). This article describes what ADS-B is, how I receive it and how I display it, report on it and ultimately send it on to other folks.
| Project Cost | Build Time | Assumed Knowledge |
|---|---|---|
| $60-$120 | 2hrs-1day | Basic Linux Familiarity with Single Board Computers (eg Raspberry Pi) |
What is ADS-B?
ADS-B is a system in which electronic equipment onboard an aircraft automatically broadcasts the precise location of the aircraft via a digital data link. The system involves an aircraft with ADS-B determining its position using GPS. A suitable transmitter then broadcasts that position at rapid intervals, along with identity, altitude, velocity and other data. Dedicated ADS-B grounds stations receive the broadcasts and relay the information to air traffic control for precise tracking of the aircraft.
- Automatic - Requires no pilot input or external interrogation.
- Dependant - Depends on accurate data from the aircraft’s navigation system (eg. GPS).
- Surveillance - Provides aircraft surveillance data to facilities that require the information.
- Broadcast - Information is continually broadcast for monitoring
Here in Australia ADS-B is mandatory on all aircraft operating above FL300 (30,000ft).
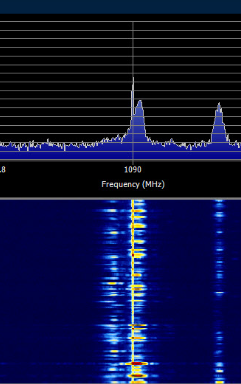
ADS-B data is broadcast every half-second at 1090MHz using a 50kHz pulse-poition modulated digital data link, and has a very digital look when viewed on an RF waterfall:
Broadcasts may include:
- Flight Identification (flight number callsign or call sign)
- ICAO 24-bit Aircraft Address (globally unique airframe code)
- Position (latitude/longitude)
- Position integrity/accuracy (GPS horizontal protection limit)
- Barometric and Geometric Altitudes
- Vertical Rate (rate of climb/descent)
- Track Angle and Ground Speed (velocity)
- Emergency indication (when emergency code selected)
- Special position identification (when IDENT selected)
- The ability of a ground station to receive a signal depends on altitude, distance from the site and obstructing terrain. The maximum range of each ground station can exceed 250 nautical miles. In airspace immediately surrounding each ground station, surveillance coverage extends to near the surface.
My ADS-B Receiver Setup
This is the second generation of ADS-B receiver running at my station; the first generation was located on my balcony and not capable of 24x7 operation; this has since been relocated with a dedicated Orange Pi, reciever and antenna.
You can substitute anything you want for the Orange Pi, as long as it can run Linux (Armbian ideally if you want to make it as easy as my setup was) and has USB support for the USB SDR Dongle. I am a huge fan of the Orange Pi PC (1GB) model as you can pick it up from the official store for around $40AUD.
- Orange Pi One 🛒 or the Official Shenzen Xunlong Store↗ on AliExpress.
- Nooelec NESDR SMArt v4 Software Defined Radio 🛒
- ¼λ Mini Whip (trimmed supplied antenna)
Be aware also many RTL-SDRs are NOT well engineered and have large drifts or are only designed to pick up strong broadcast FM/DVB-T signals, read reviews and buy from a reputable source. I highly recommend this one.
If you can get it though get this, I’ve been wanting a second one but they haven’t been available for sometime.
Optional Extras
17th Nov 2021 Edit: While building the double Moxon array antenna for 70cm satellite work the LNA and DC-Filter destined for that project are being tested on my ADS-B project. This will be occuring for the next week and a decision will be made as to modifications to the ADS-B configuration based on the performance of these devices. If you’re using the FlightAware Pro Stick, don’t bother with an LNA. There’s an integrated 20dB 1090Mhz optimised amplifier that your LNA will not improve.
Getting Started
The first task was to take the mini magnetic mount antenna and fix it. We do this by trimming it down to an exact ¼ wavelength required for 1090Mhz reception - or 69mm to the base or ground plane.
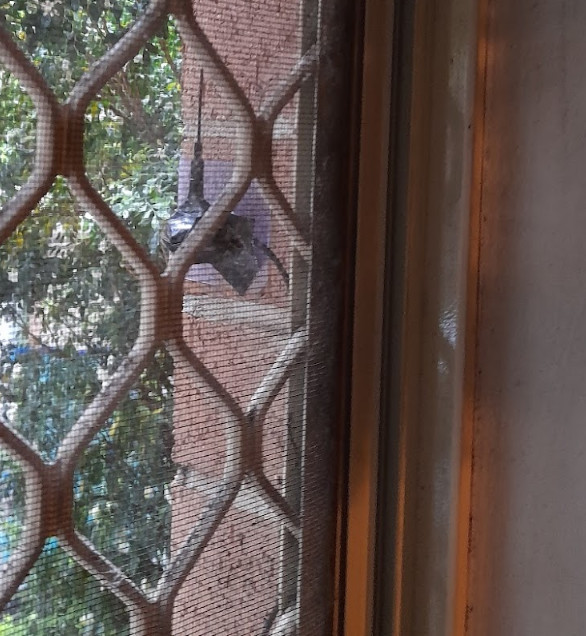
My antenna is currently mounted outside my bedroom window and is operating without a ground plane, the next thing I plan to rectify to improve. While located along a north facing wall of a inner city apartment building; this antenna currently provides a reasonable range.
As with all radio receiving, the placement of the antenna seems to have way more impact on your reception than any particular antenna and I’ve experimented with various antennas in this setup over the last few months even the improvement by adding a simple ground plane to this antenna wasn’t worth attracting unwanted attention to it. 1090Mhz is in the gigahertz range and as we increase in frequency RF signals penetrate less material, line of site is ideal, so pick a place with a nice large sector of the sky visible if possible for the placement of your antenna.
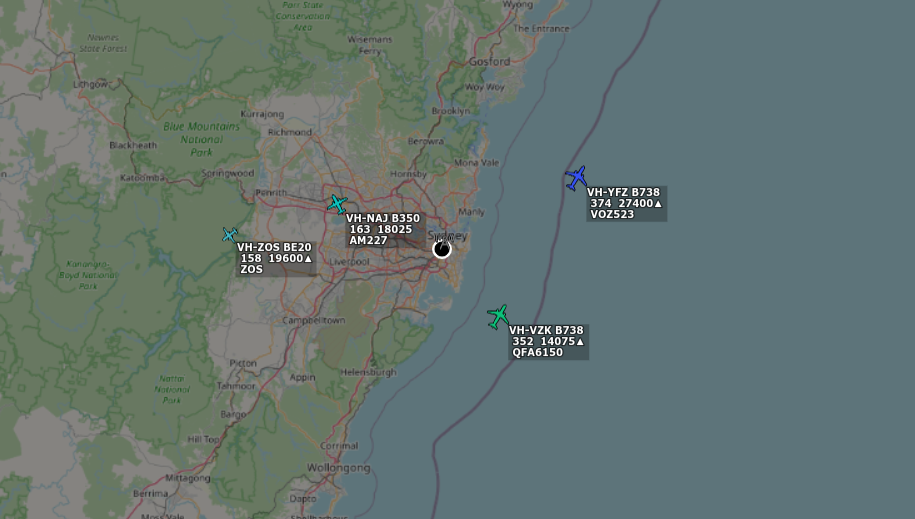
Typical Air Traffic and Range
A typical 48 hours of flight paths picked up by my receiver looks like:
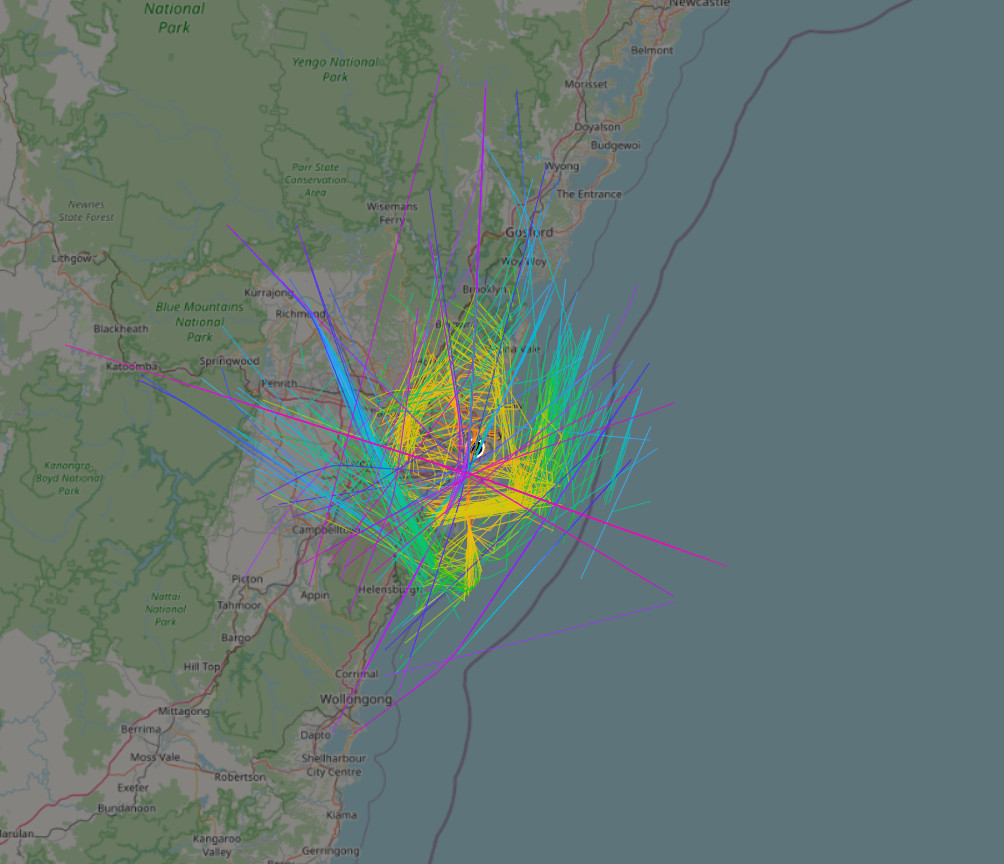
The current setup easily picks up most traffic within 50nm and regularly reaches closer to 100nm. This was greatly improved with a ground plane on the antenna as was used during the first generation of this project however a more concealed antenna was required for 24x7 operation.
The Nuts and Bolts
Making use of the current infrastructure at home including the 24x7 server controlling Home Assistant, MQTT and the smarthome projects; the client/server model was taken for ADS-B Monitoring.
The radio and main server are seperated in my environment purely for convenience; this also allows tar1090 to manage a much larger dataset and more storing and development opportunities around the ads-b data; this details how that’s done.
The Radio
- Radio1 - Orange Pi with USB RTL-SDR Dongle
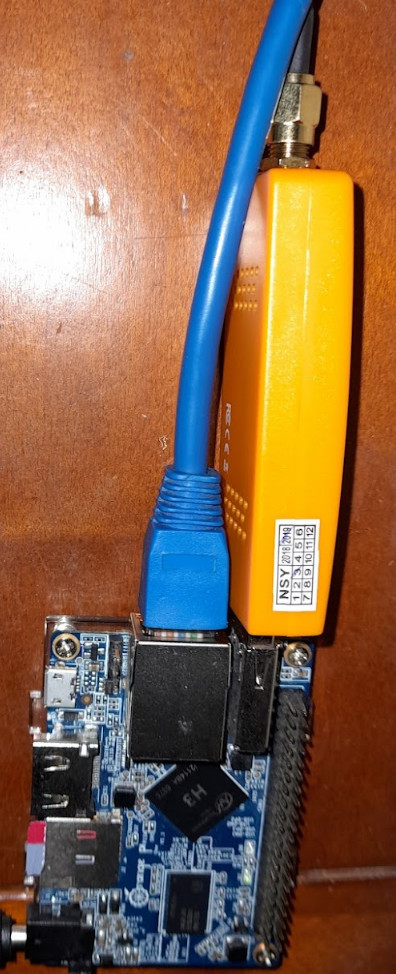
Note: A FlightAware Pro Stick is pictured above. While I’ve had excellent results with this product, it is regularly unavailable. I highly recommend the Nooelec NESDR SMArt v4 SDR linked at the top of this article.
If your Orange Pi is brand new or you’re new to Orange Pi and Armbian, you should get started with the Armbian Getting Started Guide↗.
Regardles of which Linux you’re on you’ll want to make sure that the RTL DVB kernel modules are disabled to allow access for the RTL-SDR drivers.
1
2
3
blacklist dvb_usb_rtl28xxu
blacklist rtl2832
blacklist rtl2830
You can rebuild the module dependency tree by running sudo depmod -a
Dump1090
I’ve been using the packaged version of dump1090-mutability that’s in the apt repositories for Armbian; just apt install dump1090-mutability to get it running. Configurtion is very straight forward, use your favourite text editor to update the /etc/default/dump1090-mutability file.
You’ll definitely want to update your LON and LAT to as close as you can find for the location of your antenna. I do this to 6 decimal places. DEVICE is useful if you’re running more than one radio on your computer. I have no problems decoding ADS-B with GAIN set to “max” and if you’ve got a good dongle PPM can be left at 0 (though with some cheap dongles I’ve seen this need to go as high as 160!).
Dump1090 has it’s own web interface to show you what’s in the air right now around you; you can reach this at http://IP-ADDRESS/dump1090 if you have lighttpd running and have installed dump1090 from the Armbian packages.
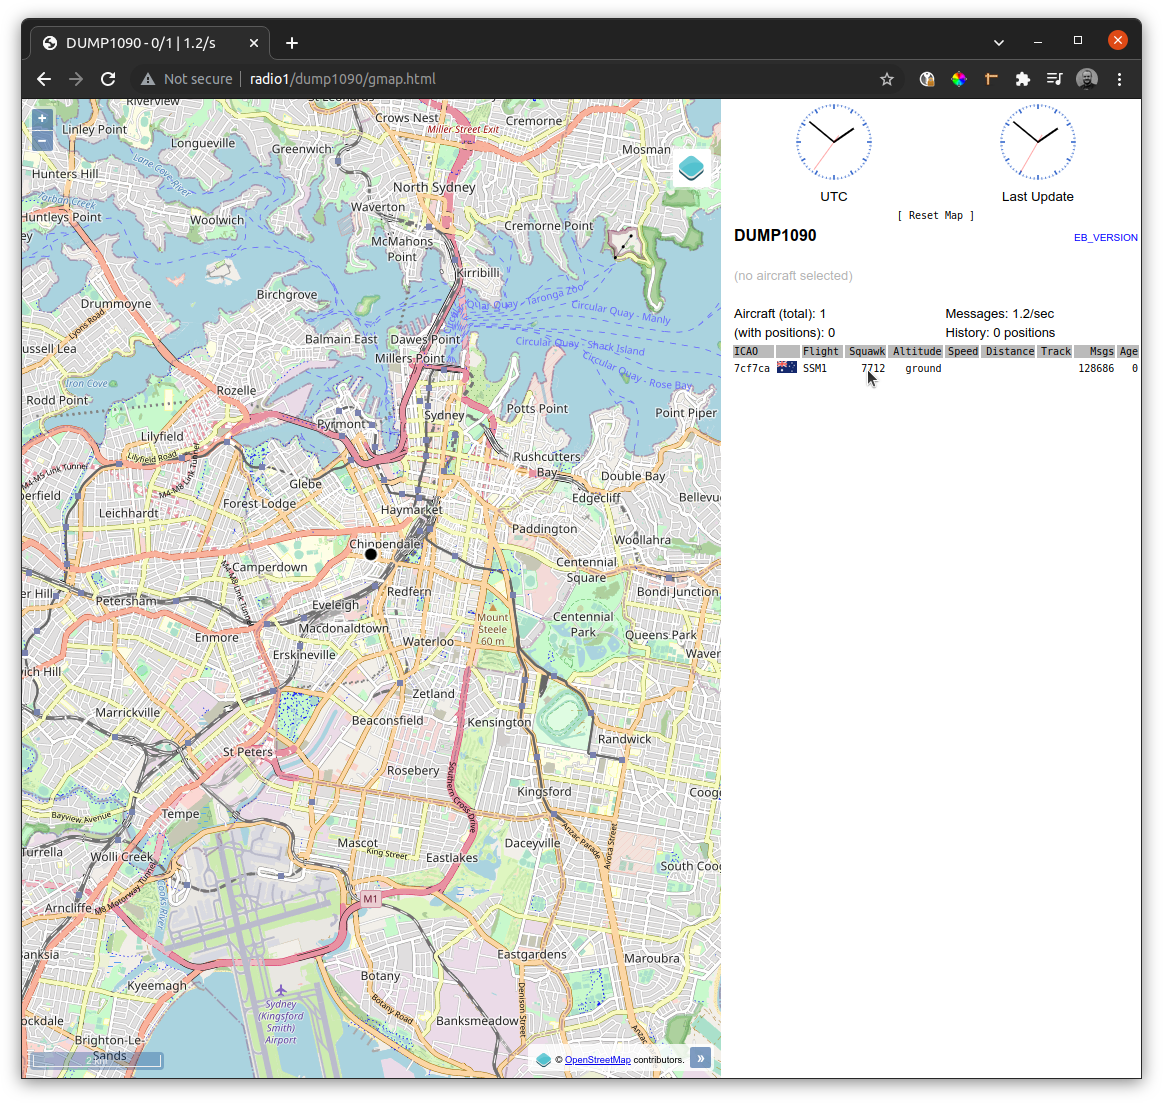
Note: Sydney Airport has a noise curfew overnight and we see little traffic in this area until 6am. This screen shot was taken at 0100 hours, local time.
If you’re not running a split client/server model, you should leave this combine1090 step out, it’s only useful for pushing data between dump1090 instances. You can run tar1090, PrettyFly and the data feeders mentioned in the Server section on the same device running your radio.
Combine1090
Combine1090 is used to forward the ADS-B traffic between the dump1090 protocol using the defined network ports; usually this is setup on the server side to connect to the remote radio but it made much more sense in this configuration for the radio to run in push mode. Under the hood Combine1090 is just a shell script and systemd startup wrapper around the swiss-army knife utility familiar to every network and system administrator, nc (netcat). This simply connects one port to another in a pipe for you, in our case the output RAW data from dump1090 on our radio to the RAW in-port on dump1090 running on our server (below for the server-end).
This additionally allows either, or both radio1 and radio3 to take the role of ADS-B monitoring; which is useful when one is taken offline for maintenance, upgrades or changes.
Configuration of combine1090 is performed through environment variables configured in the /etc/default/combine1090 file;
1
2
3
SOURCES=127.0.0.1
PORTS=30005
TARGET=houseserver.lan:30004
Restart tar1090 using systemctl restart combine1090
You should leave the dump1090 options (RECIEVER/DECODER and last few lines of the default config) commented out and utilise the packaged dump1090-mutability (or dump1090-fa from piaware) for Armbian.
I highly recommend you add the rtl-sdr package as well for other handy tools (like rtl_tcp to remote control the radio across the network, but more on this in a future post)!
Combine1090 will keep trying to connect until your server is online, so move on to the next section already.
The Server
The server already existed on my network; if you’re running without it you can leave combine1090 off for now. It’s worth considering the split as tar1090’s data storage is not well optimised for large amounts of data, and I now keep 48 hours of fight history in the tar1090 data file.
- On Server
- Ubuntu 21.10
- Dump1090-mutability↗
- Tar1090↗
If you chose to run tar1090 directly on a Pi, be aware of the processing time required for a large number of flights and adjust your retention time.
Tar1090
Tar1090 provides a better map and UI in my opinon than dump1090 but the more powerful feature it provides is time travel - being able to view your history for it’s set retention period.
Once installed alongside lightttpd (or nginx in my case, however nginx reverse proxy configuration is beyond the scope of this article) you can find tar1090 at http://IP-ADDRESS/tar1090 and for the historic view http://IP-ADDRESS/tar1090?pTracks.
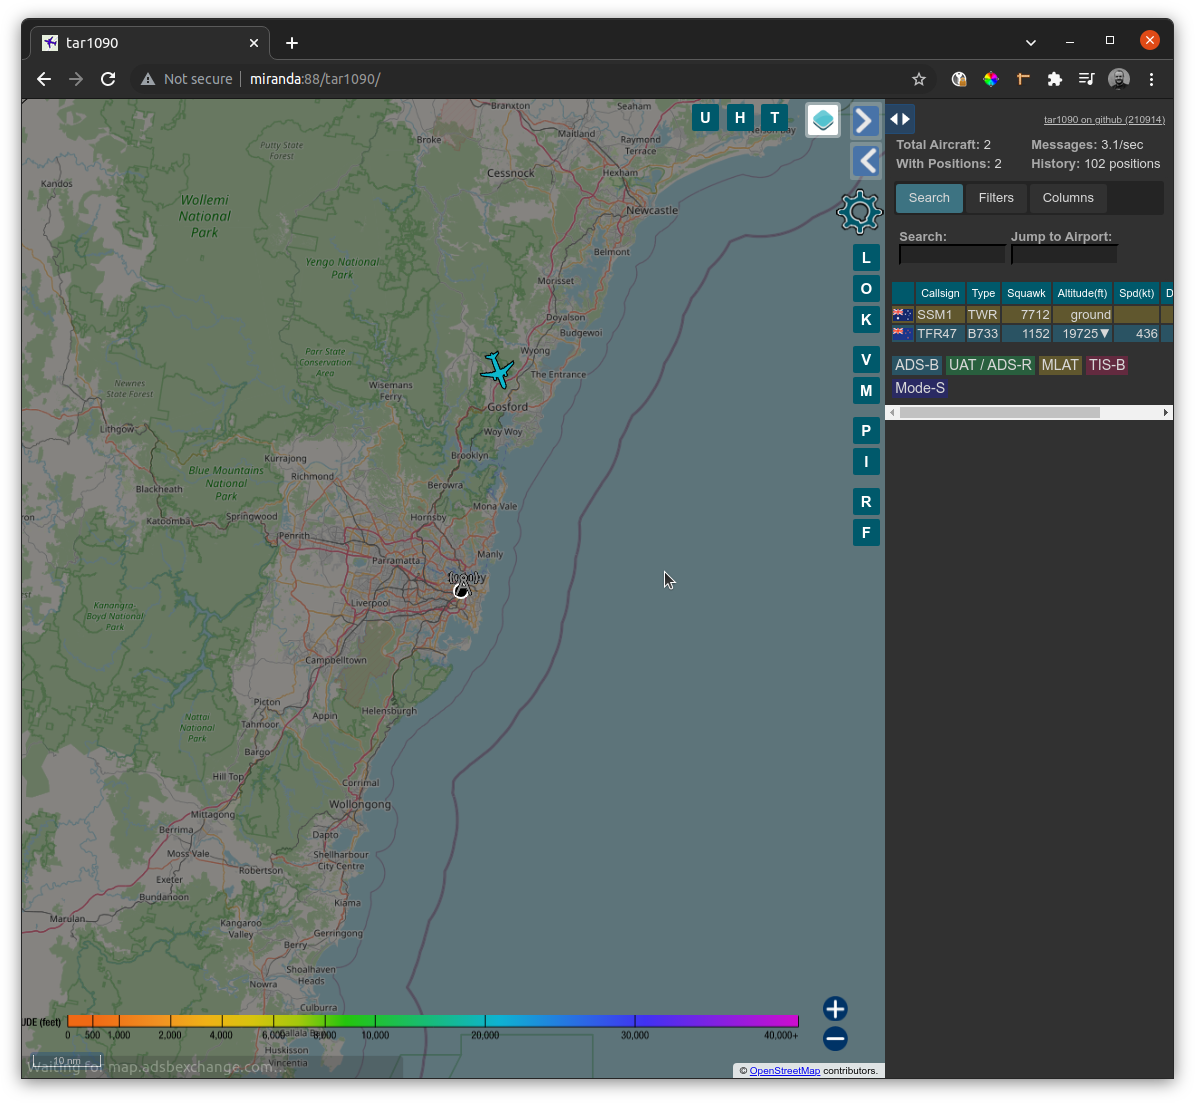
Note: The ‘range’ screenshot earlier in this article shows tar1090 with the ‘pTracks’ URL query-string argument.
Installation is very easy, following the instructions from the tar1090 project; once installed you can modify the /etc/default/tar1090 file and modify the relevant variables. The important one to update:
1
2
# hours of tracks that /?pTracks will show
PTRACKS=48
Restart tar1090 using systemctl restart tar1090
Related Projects
- PrettyFly - Prettified ADS-B reporting, work in progress.
The PrettyFly project is a work in progress which I will soon be developing further. The current version utilises the tar1090 pTracks data files (hence the 48 hour rentention I like to run), but later research has indicated that the raw or CSV protocol from dump1090 would be easier to process into the kind of reports I want to run. For now though check out the page above for some of the reporting that is done by this first foray into writing code to report on ADS-B data.
Some exampel output from PrettyFly:
1
2
3
4
5
6
7
8
9
10
11
12
13
14
15
16
17
18
19
20

By Country of Registration

 1. 🇦🇺 Australia (124)
 2. 🇺🇸 United States (11)
 2. 🇨🇳 China (11)
 3. 🇸🇬 Singapore (8)
 4. 🇳🇿 New Zealand (4)
 5. 🇦🇪 United Arab Emirates (3)
 5. 🇲🇾 Malaysia (3)
 6. 🇹🇼 Taiwan (2)
 6. 🇯🇵 Japan (2)
 7. 🇹🇭 Thailand (1)
 7. 🇱🇰 Sri Lanka (1)
 7. 🇰🇷 South Korea (1)
 7. 🇷🇺 Russia (1)
 7. 🇶🇦 Qatar (1)
 7. 🇵🇭 Philippines (1)
 7. 🇬🇷 Greece (1)
 7. 🇫🇯 Fiji (1)
Along with more detailed categorisation and reporting:
1
2
3
4
5
6
Flights of Interest

🚑 Medical 9: VH-RFD/AM228, VH-RFD/AM293, VH-RFD/AM277, VH-AMQ/AM242, VH-PWX/AE913, VH-ZSU/CFH23, VH-AMR/AM214, VH-NAJ/AM227, VH-ZCY/CFH21
⛑ Rescue 1: VH-TJE/RSCU201
✈️  RAAF 4: A36-002/ASY326, A97-465/TROJ26, A30-003/WGTL15, A56-003/EVY55
💣 Military Contractor 4: VH-SLF/FRSC11, VH-SLF/FRSC31, VH-LJU/FRSC12, VH-LRH/FRSC32
It was named PrettyFly mostly because of it’s unapologetic use of emoji.
You can find the PrettyFly project at https://github.com/jaredquinn/prettyfly↗, including the (almost) daily updated data/*.json files for operators and aircraft classification.
Live Data
I additionally send my data to my own Tar1090 instance running in the cloud and in future posts will be exploring additional tools, bringing in data for more stations and a range of other related articles.
I host the live tools on Vultr, you can sign up using my referral link↗.
Data Feeders
If you’re going to run this kind of receiver, it’s worth feeding the data to FlightAware at minimum as the benefits they provide (buiness plan access) is worth it alone; however as a believer in open-data and sharing, I particularly like ADSBHub as they will provide the global ‘firehose’ of ADS-B data from all 2,000 contributors in their community.
I feed data to:
- ADS-B Hub Station VK2WAY/SYD1↗
- FightAware - FlyByNightSydney↗
- OpenSky Network↗
- FlightRadar 24 (Radar T-YMCO1)
Running the split client/server mode also gives me the benefit of running all my data feeders in the centralised location, not requiring a setup on each of the radio receiver devices or future versions of it, making configuration management much easier.